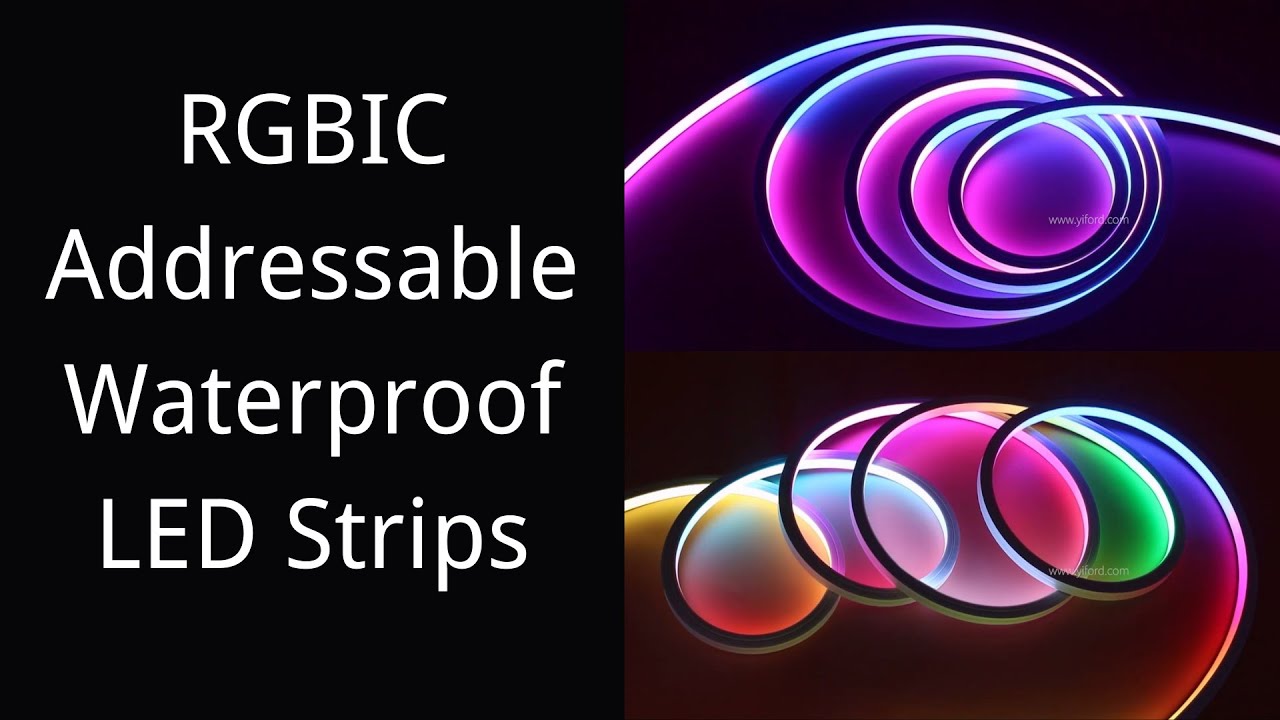

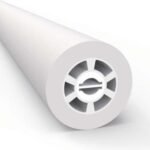
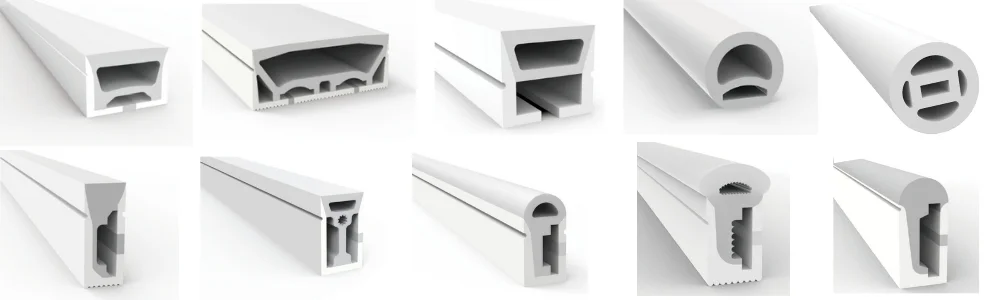
 Round Tube
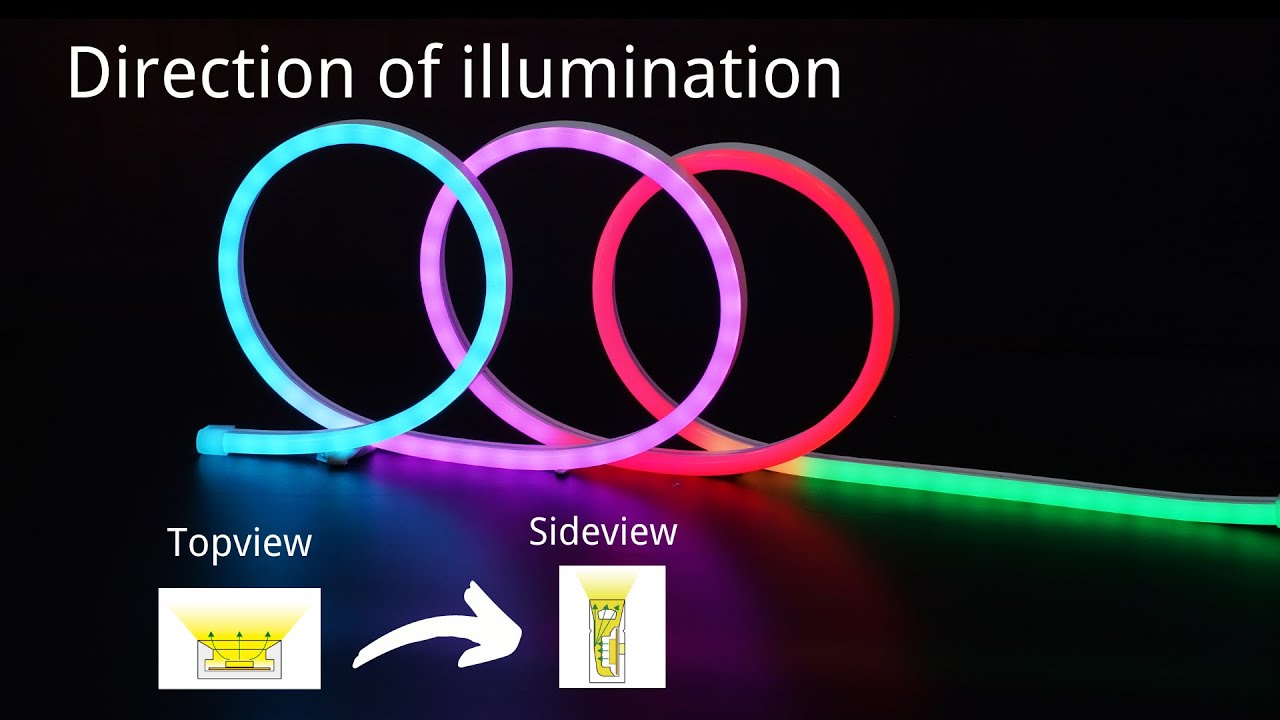
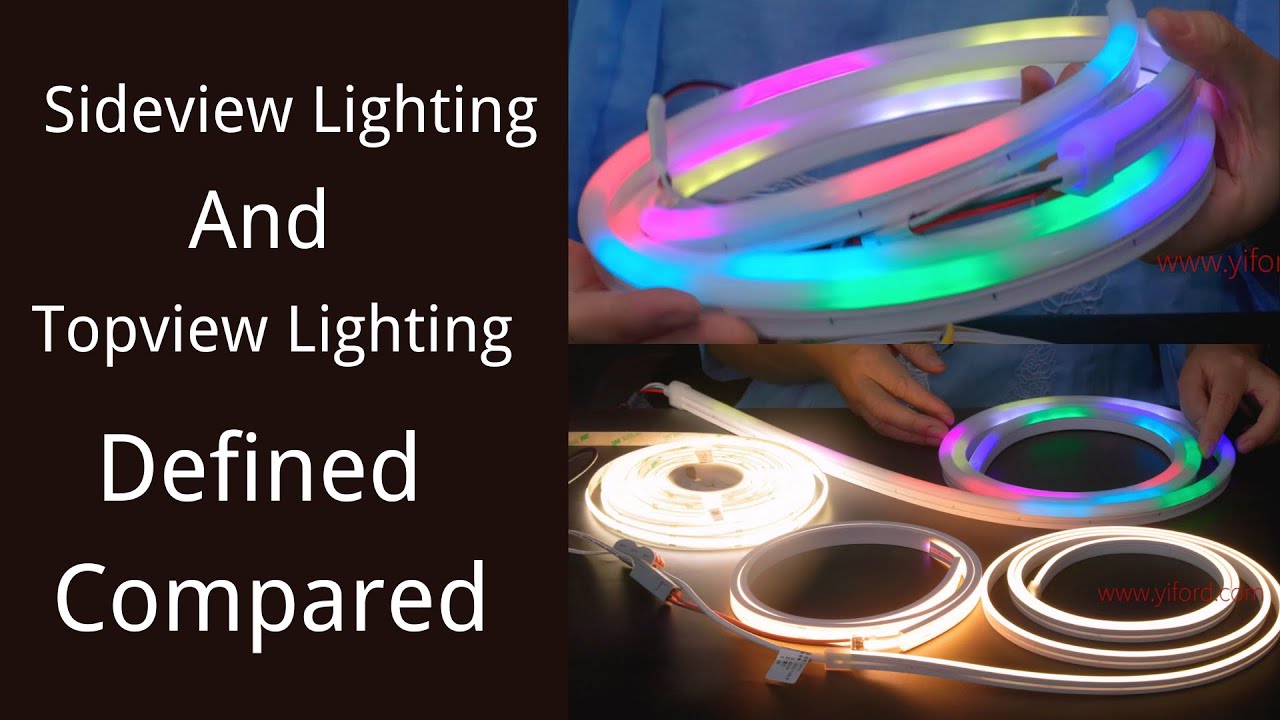
 Topview Tube
 Sideview Tube
 With Fringe
 Black Tube
 Half Cover Sleeve

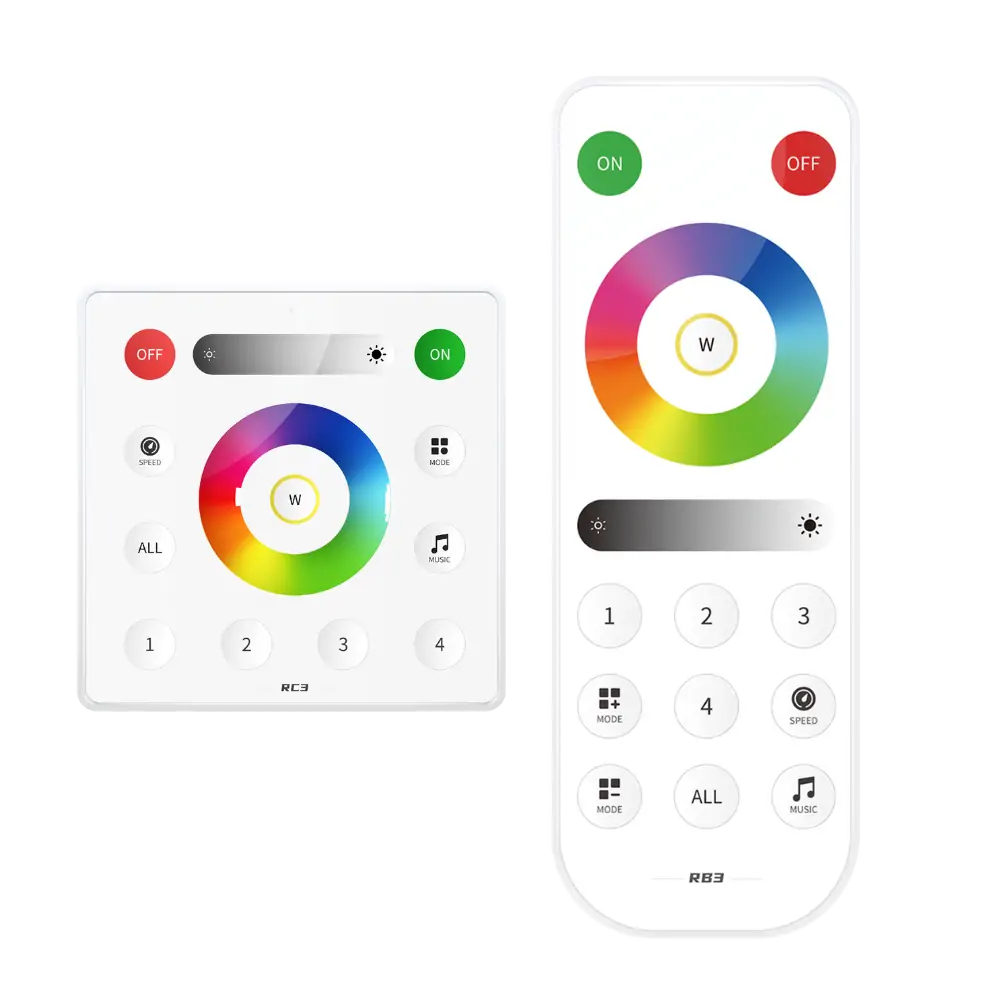
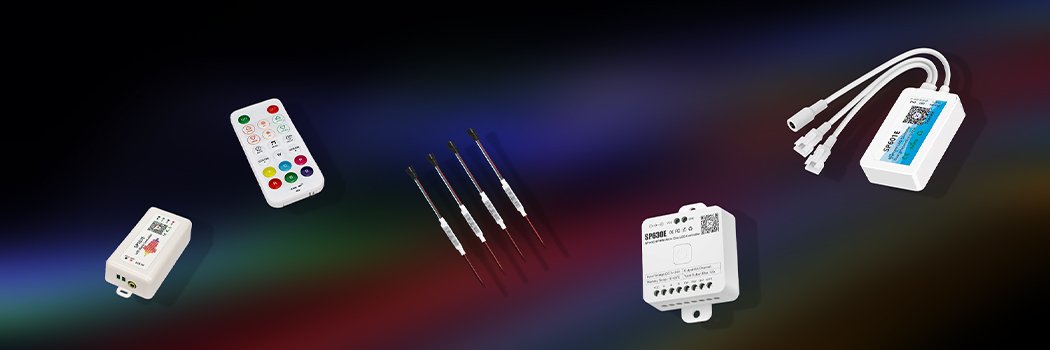
 Light Accessories
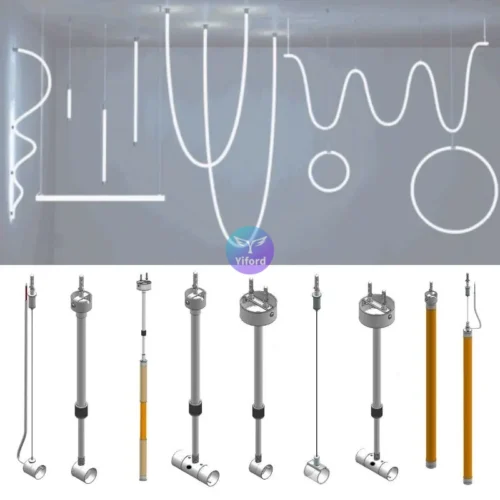

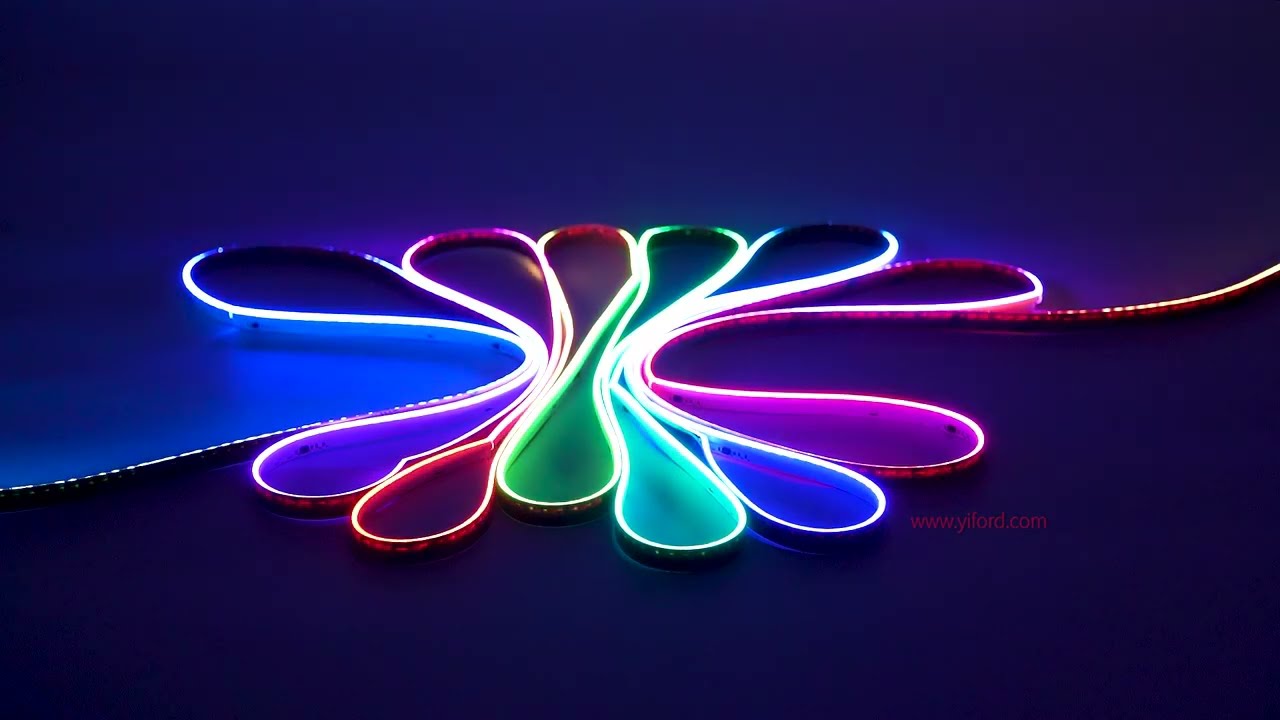
COB (Chip On Board) LED strip lights are revolutionizing the lighting industry with their ultra-thin, flexible, and high-brightness design. Popular among architects, designers, and lighting enthusiasts worldwide, they offer unmatched energy efficiency and aesthetic appeal. However, since COB LED strips typically come in 5-meter rolls but your project may require shorter or customized lengths, it’s essential to know how to cut connect, and power these strips properly for optimal usage.
If you’re wondering:
- Can I safely cut COB LED strips without damaging the lights?
- What’s the best way to connect multiple COB strips?
- How do I power my LED strips correctly?
- And what are the best practices for using COB LED strips?
Then this comprehensive guide will answer all those questions and more.
For those unfamiliar, don’t worry! We’ll also explain what makes COB LED strips different from traditional SMD strips, and why they have become the go-to lighting solution for so many projects. For a full introduction on COB LED strip lights, check out our detailed article: COB LED Light Strips Most Complete Introduction.
Table of Contents
Quick video walkthrough for a visual guide (11 minutes, with English subtitles)
Step-by-step text guide (around 4 minutes read)
How to Cut COB LED Strips Correctly
Tools Needed: A ruler or measuring tape and sharp scissors.
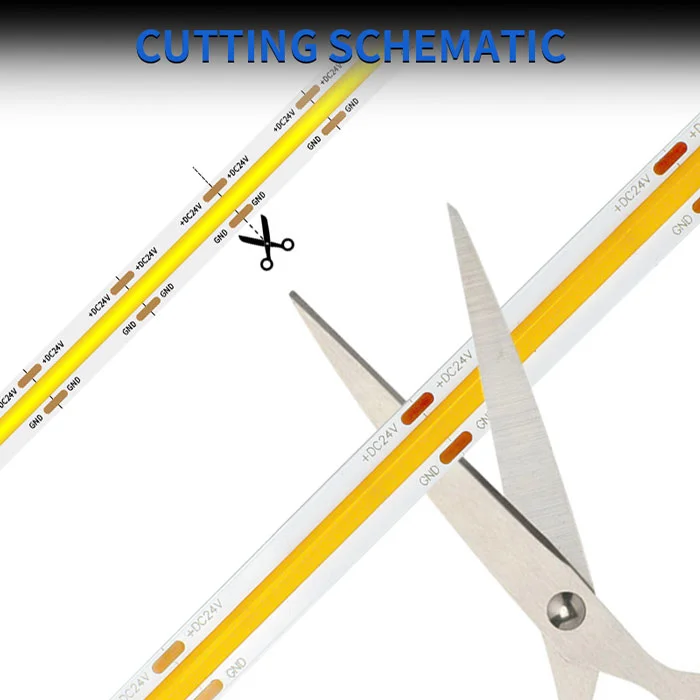
Cutting COB LED strip lights is surprisingly simple — but with some crucial rules:
- Measure twice, cut once. Accurate measurement is key to avoid waste or an ill-fitting installation.
- COB strips have clearly marked “cut lines” on their PCB (Printed Circuit Board). These cut lines indicate exactly where the strip can be cut without disrupting the electrical circuit.
- The LED chips and circuitry are grouped in segments (units), and each segment is connected in parallel to ensure that the strip continues to function properly even after cutting.
- Cutting anywhere other than these marked lines risks damaging the circuit or leaving several LEDs unlit. If you discover a few lights at the end don’t turn on, it’s probably because you didn’t cut along the designated line — simply trim off the uncertain portion along the correct mark.
- Typical cutting units vary by voltage types (12V vs. 24V) and product designs, especially for tunable or addressable RGB strips. This depends on the chip density, number of LEDs per segment, and the electrical design of the PCB.
Cut at the designated mark, the led strips can be used normally, what will happen if it is not cut at the designated mark?
For example, you will find that several lights at the end are not on.
The way to solve this problem is to cut off the rest of the uncertain lights, remember to cut along the cutting line.

the cutting unit lengths of some COB strips
12V and 24V COB LED Strips Lights cut length
You may have found that, In general, the cutting length of 12V and 24V is the same,such as white cob led strip lights, and single color led light strip. but for the tunable COB light strips, RGB addressable led strip lights, 12V COB led strip lights, 24V COB led strip lights, each cut length is different, this is because the PCB design is different, the length that can be cut is the same as It is determined by the density of chip set lamps, the number of lamp beads distributed in each segment, and the current setting.
How to Connect Multiple LED Strips Together
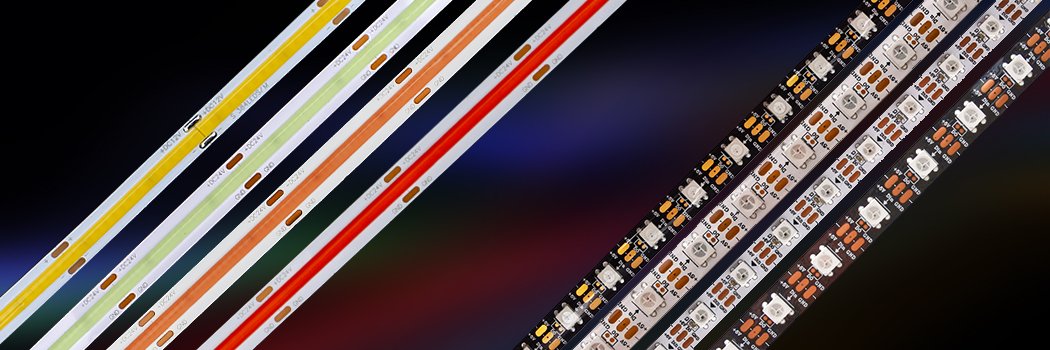
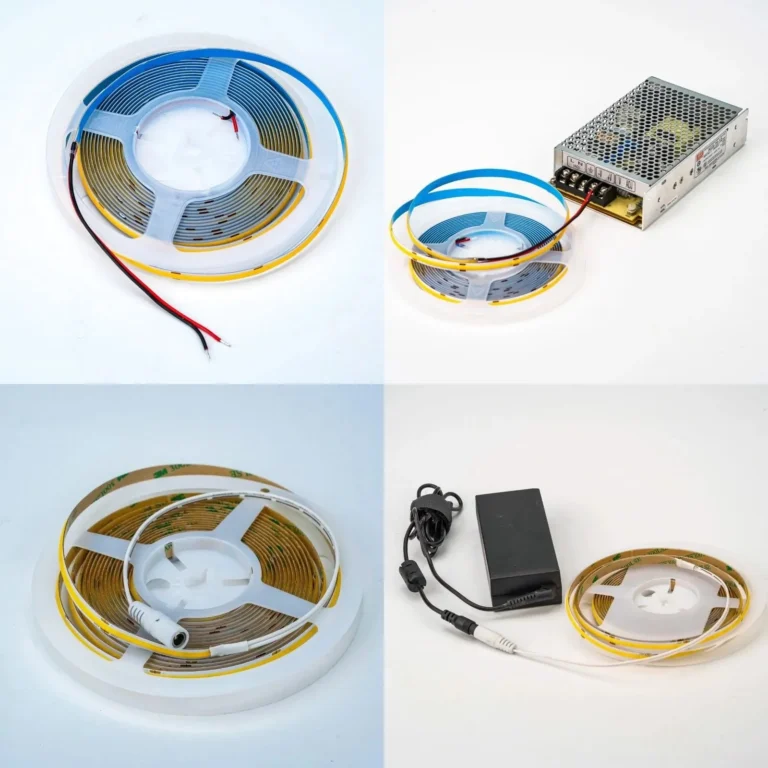
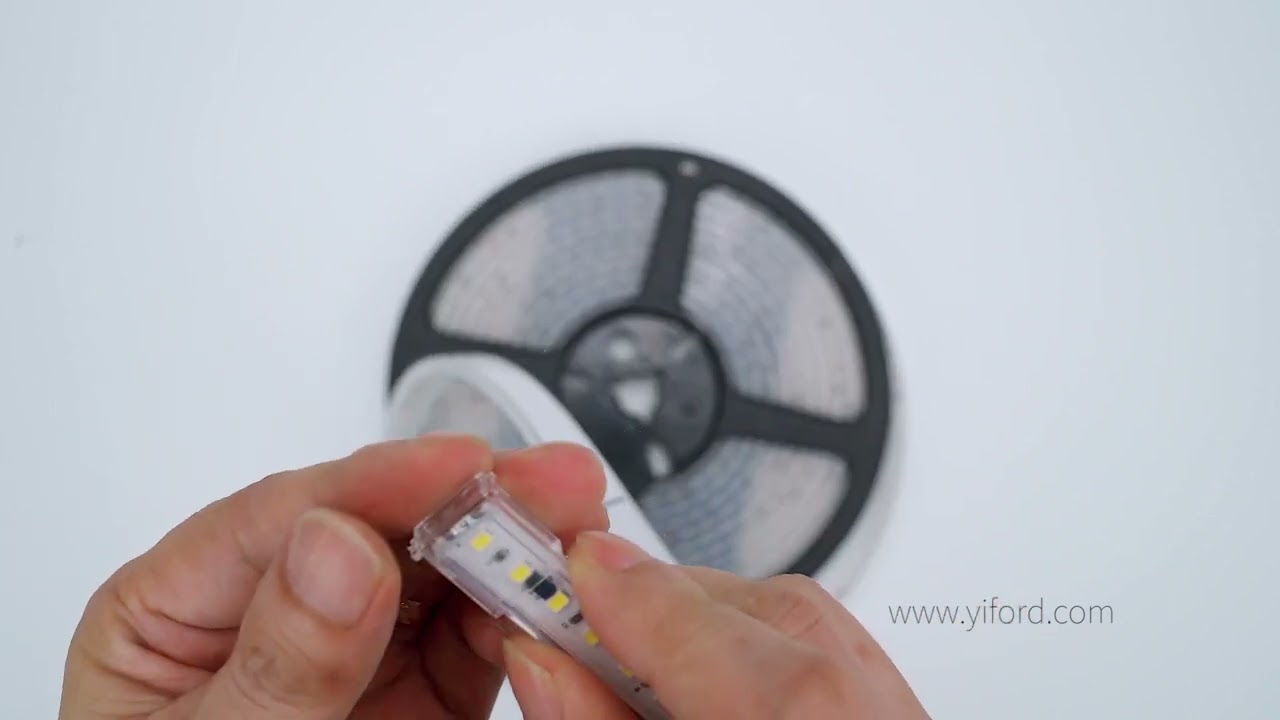
The standard packaging for COB LED strips is 5 meters per roll, with two parallel wires (red for positive, black for negative) attached at both ends, ready for power supply connection.
Ways to Connect COB LED Strips
- Direct Wiring: You can directly connect the strip wires to your power supply terminals or DC connectors.
- Soldering: Although reliable, soldering requires skill, tools, and patience. This method joins strips and wires with tin solder and rosin flux but is less user-friendly for beginners.
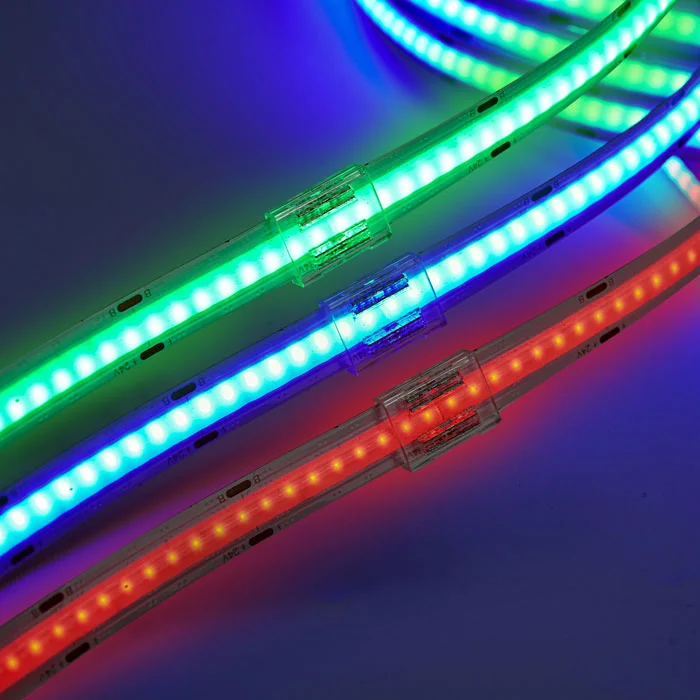
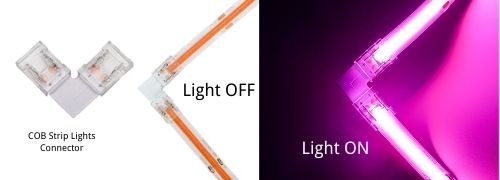
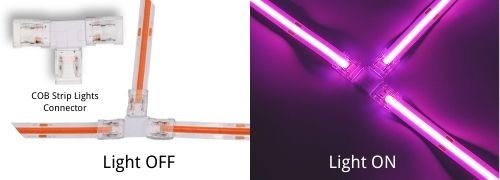
- Solderless Crystal Connectors (Highly Recommended):
- These transparent connectors snap onto the strip without soldering, making connections quick and easy.
- They have metal pins that pierce the copper pads on the LED strip and wires, ensuring solid electrical contact without damaging the lights.
- Since they’re transparent, they won’t interfere with light output or aesthetics.
- Designed specifically for COB LED strips, they work for end-to-end, wire-to-strip, and multi-way (T-shaped) connections.
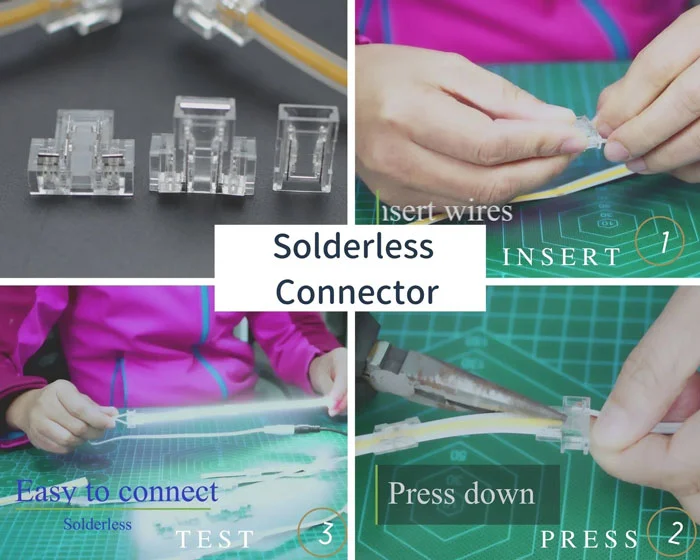
How to Use a Crystal Connector
- Prepare a 22 AWG wire for power connection.
- Insert the cut LED strip end and wire into the designated slots of the connector, ensuring copper pads line up with the metal pins.
- Press down firmly (using a specialized tool, nail edge, or fingernail) to lock the pins into the copper pads.
- Gently pull the strip or wire to test the firmness of the connection.
- Once connected, test the lighting to confirm the integrity. You should see no reduction in brightness or flickering.
How can I supply power to the light strips that have been cut without wires or DC input terminals?
This is a transparent crystal end connector. You will see that there are two symmetrically arranged metal pins, no need to distinguish between positive and negative. Prepare a 22Awg wire. Keep the connection between the wire and the light strip level.
The positive pole of the wire is opposite to the positive pole of the led strips. Insert the light strips and wire into the corresponding connector position of the connection terminal, insert the cob led strips end into the slot, and make sure that the copper sheet is just below the metal pin of the connector.
To complete the connection, use a tool to press the metal pin down until the surface So far. If you don’t have a tool at hand, you can press it down with your nail shell, and you can see that the metal needle has been inserted into the copper sheet of the wire and light strip.
Gently pull the cob led strips to check that it is locked in place and well connected.
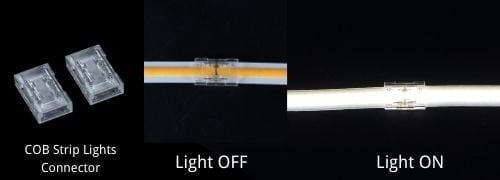
As shown in the figure, the COB light led strips is now connected to 2 wires, and the test is OK.
compare with the light on and light off, the transparents crystal connector are not effect the lighting brightness.
Now you may have question: can I connect different led light strips together?
the answer is yes, use the solderless led light strips connecter, you could connect different color led strips together.
Watch below video for how to use solderless connector for cob led strip lights :
Videos for how to install led strip lights
Which types connector could be used for the cob led strip lights?
Light strips are often need be cutted or re-connected, and some problems related to cutting will be involved here. Here we use the new type flexible lighting COB (chip on board) light strips as a case to explain all the questions you have. you will get know How to cut and connect cob led light strips ? with different types connectors.
Solderless connectors for COB led strips--how to use
The LED light strip is like a luminous ribbon, while providing incredible flexibility. Its characteristics allow the light strips to have many functions, and it is widely used in various places and areas of life. They are the perfect lighting for room. with excellent lighting solution.
If your power supply has a DC connector, how do you supply power to this strip of light?
You can find other accessories on our website.
Please note that the DC connector is divided into positive and negative poles. The positive terminal of the PCB is connected to the positive terminal of the DC connector, and the negative terminal of the PCB is connected to the negative terminal of the DC connector,
so that the DC connector can work normally when it is connected to the DC connector of the power supply.
If the connection is reversed, there is no need to worry. The result is just that the cob led strips does not light up.
Because of the cob led strips reverse current protection function, the led power supply and led cob light will not be burned out.
With this crystal connector we can use this connector where it is inconvenient to arrange the light strips to form a design scheme with a hollow in the middle and bright sides. At the same time, it can be bent into different shapes and can also connect multiple COBs Light strips.
How to seamlessly connect 2 COB light strips?
Let me show you another board-to-board crystal connector which is no positive/negative. It is also very simple to use.
Place the positive poles of the two light bars facing each other and insert them into the terminals. Use a tool to press the metal pin down until the surface is flat.
The metal pins are inserted into the copper sheet of the PCB board to form a conductive bridge. After connecting to the power supply, you can see that the connection can also emit light without affecting the overall effect.

If you have this accessory with a solderless connector, you can also turn the board-to-board crystal connector into a board-to-wire connector.
The operation method is similar to the previous one. The positive pole of the COB board is opposite to the positive pole of the PCB board. Insert the two ends of the crystal connector respectively, and then press it down,
the COB light bar is connected to the line and can be directly connected to the power supply.
watch video for how to use solderless connector for cob led strip lights, The operation method can refer to the following 15-second video:
How to Choose the Right Connector for Your Project
Choosing the correct connector ensures easy installation and a professional finish.
- Strip width: Match connector width precisely (e.g., 8mm strip uses 8mm connectors). Mismatched sizes lead to poor connections.
- Pin count:
- 2-PIN: Single-color COB strips
- 3-PIN: Tunable white (color temperature adjustable) strips
- 4-PIN: RGB COB strips
- Connection shape: Depending on your lighting design, select from straight (inline), 90-degree (L-shaped), or 3-way (T-shaped) connectors to build diverse lighting layouts effortlessly.
3. What if some light strips do not have this seamless crystal connector?
Not all the led strips has matched connectors. for example, 3mm wide soft light strips, 5mm wide flexible led light strips, and RGB adderssabe led strip lights and so on.
If you need to connect two light strips together, It can be soldered, plus a terminal connector, which acts as a bridge in the middle.
When connecting, remember that the positive pole is connected to the positive pole, and the negative pole is connected to the negative pole.
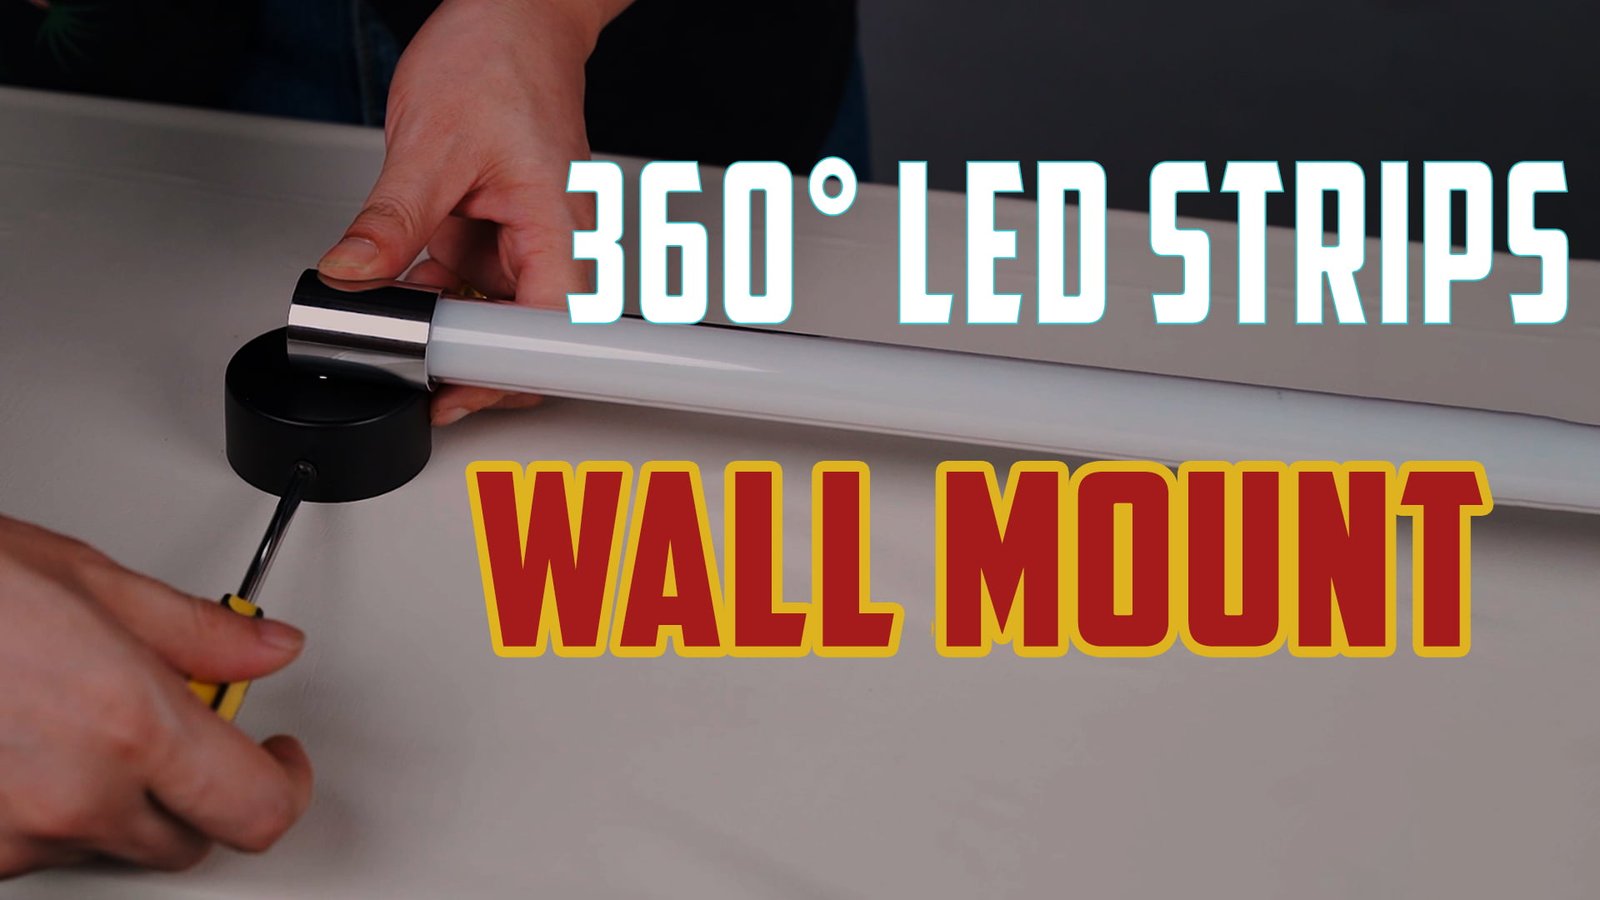
Additional Tips for Installing COB LED Strips
- COB LED strips come with a 3M adhesive backing for easy mounting on various surfaces such as metal, plastic, or wood.
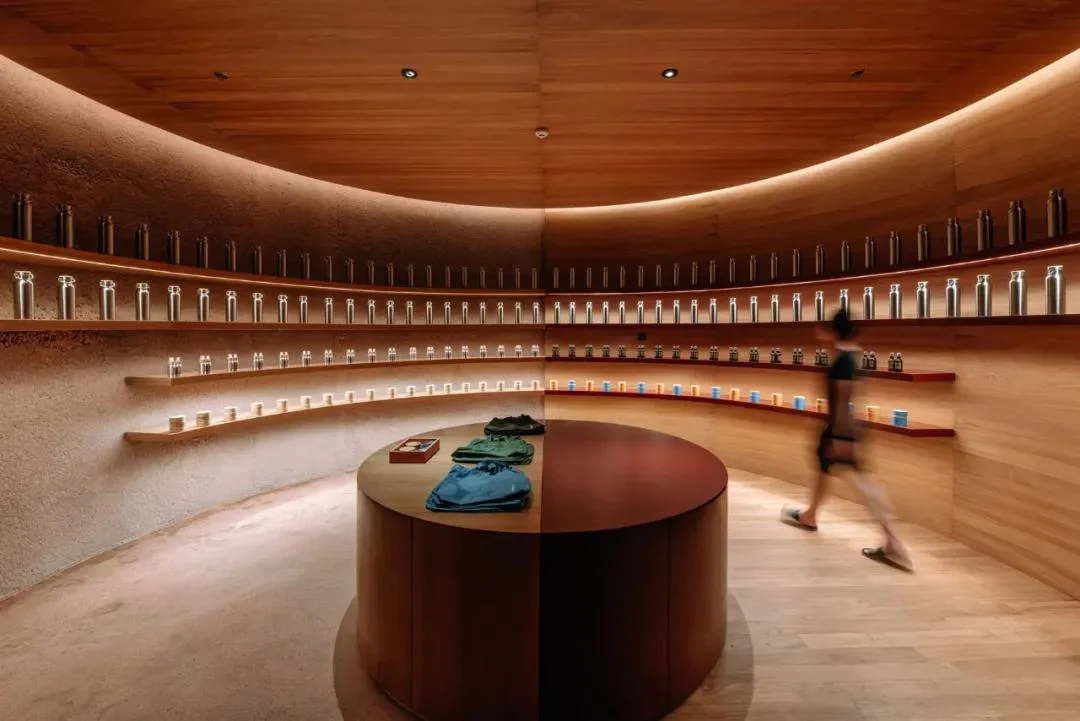
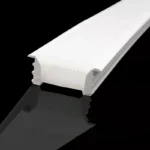
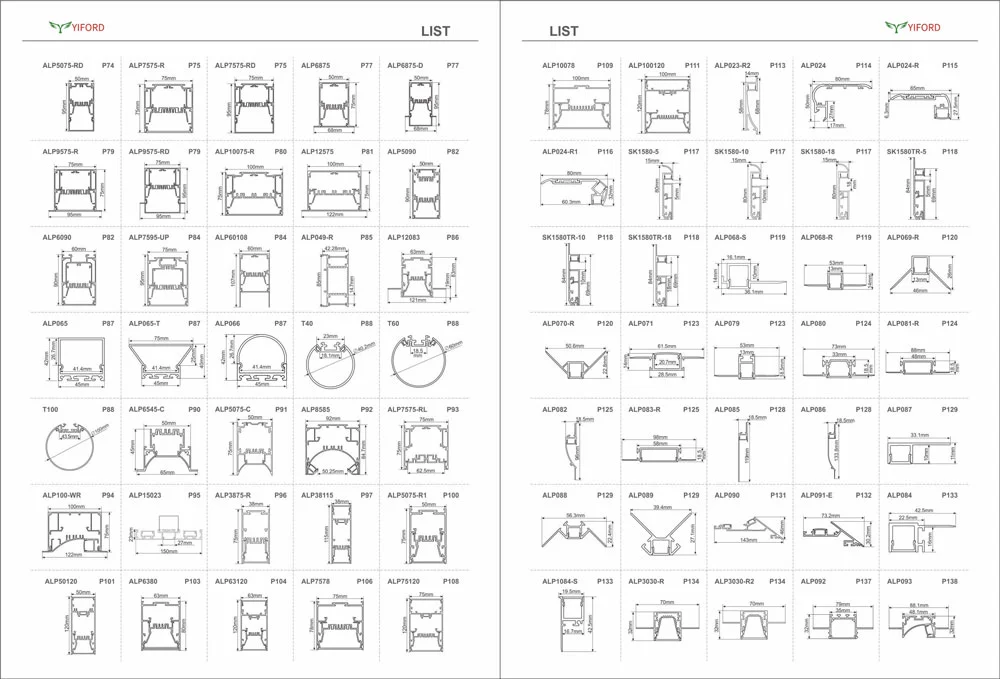
- For enhanced protection, heat dissipation, and uniform light diffusion, install the strip inside LED aluminum profiles (LED channels or extrusions).
- YIFORD supplies hundreds of aluminum profiles in multiple shapes and sizes — from flexible silicone tubes for curved installations to rigid metal channels for linear lighting.
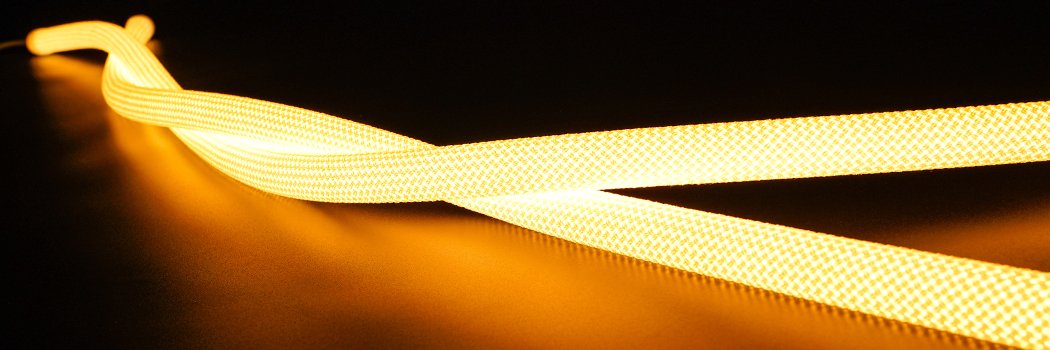
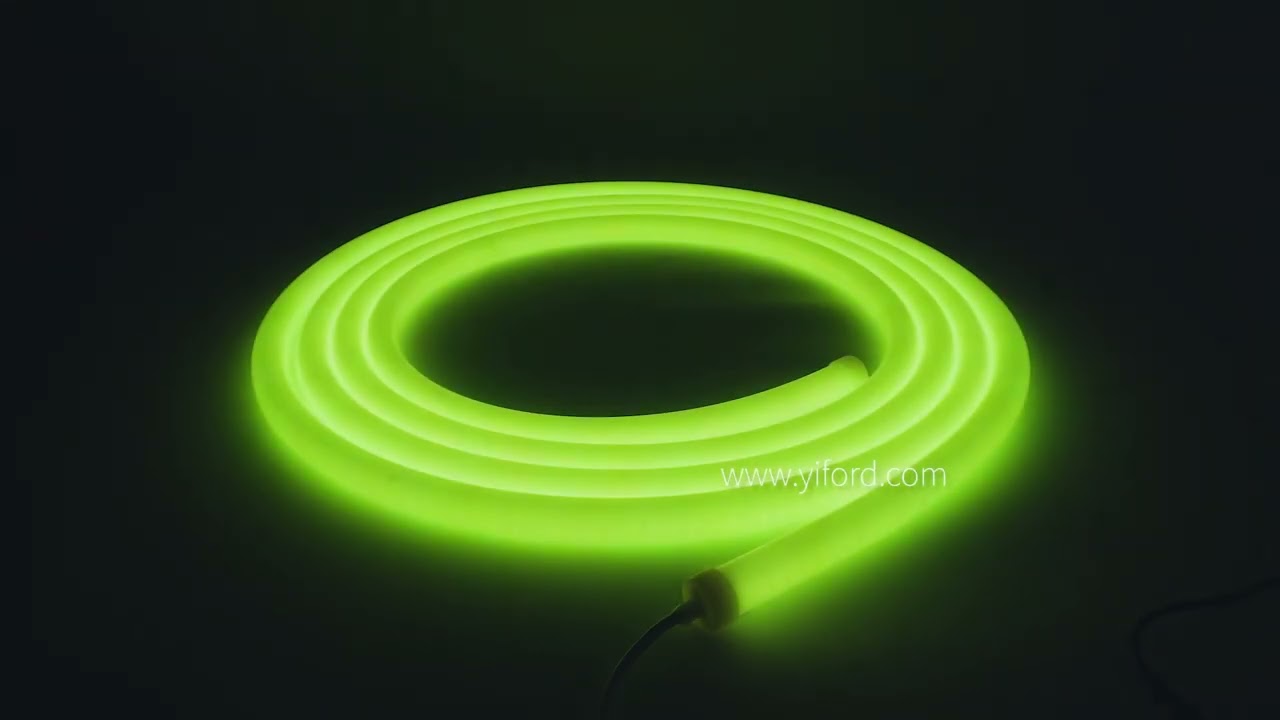
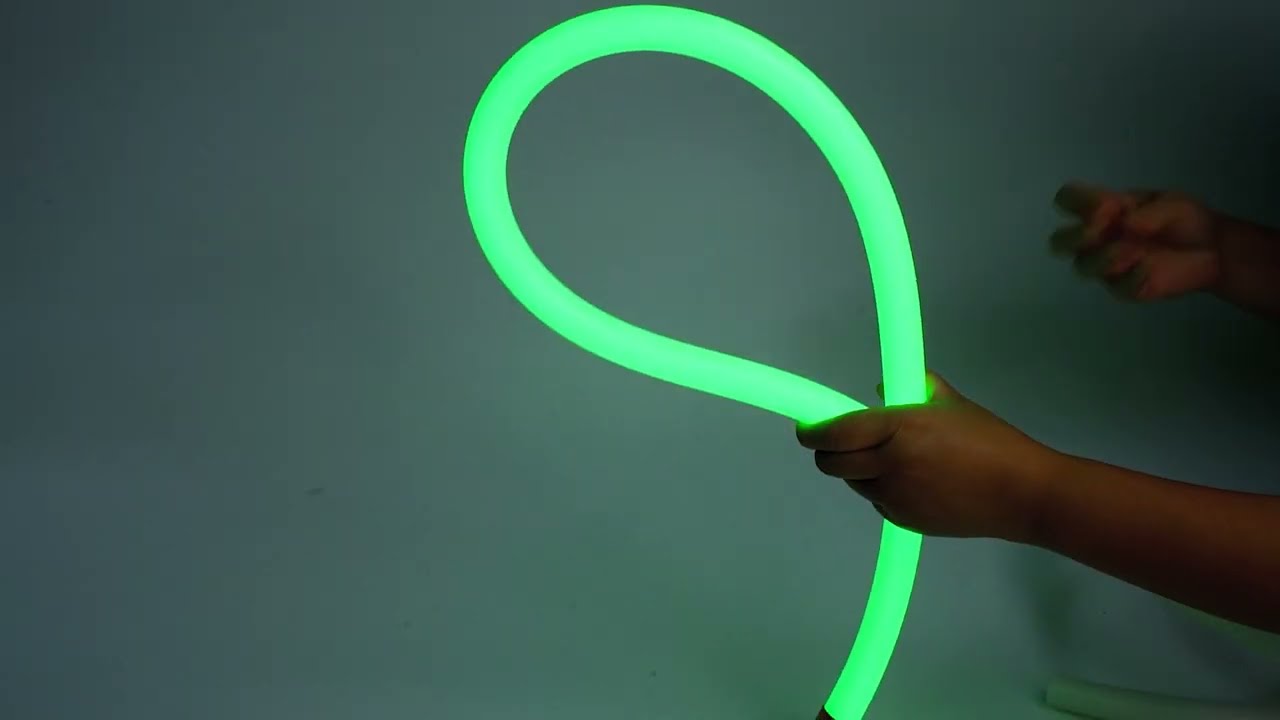
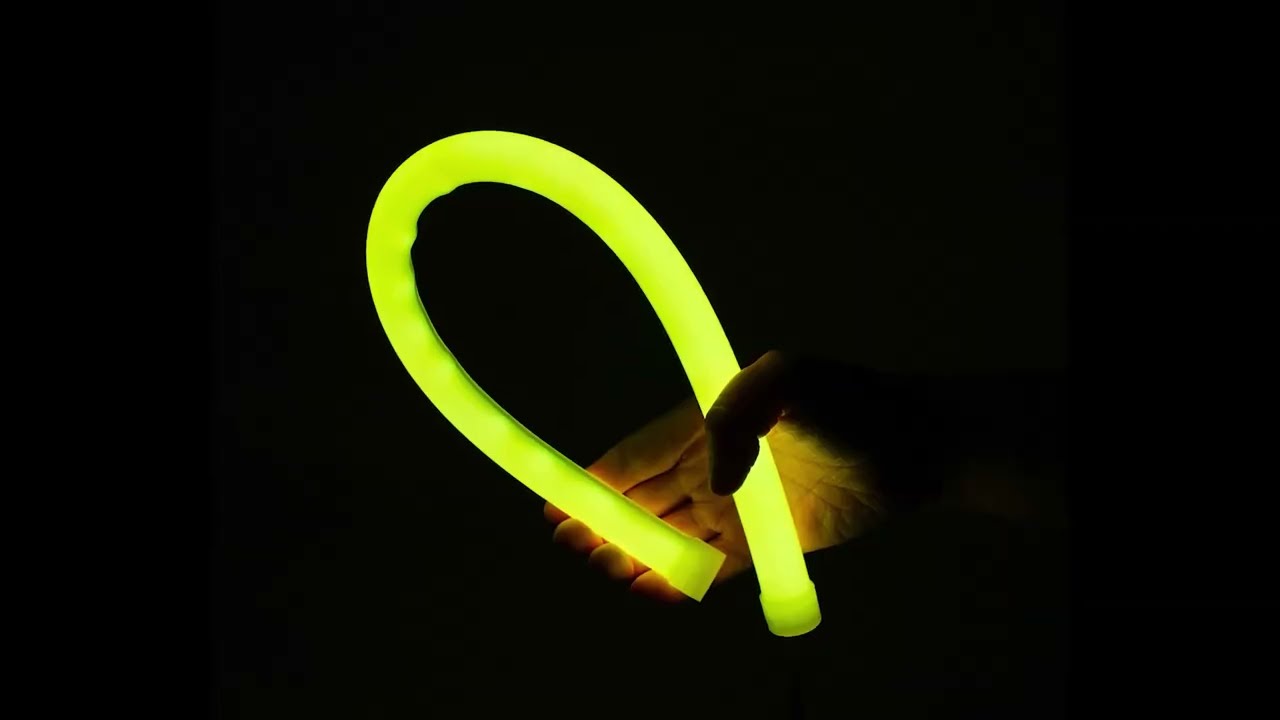
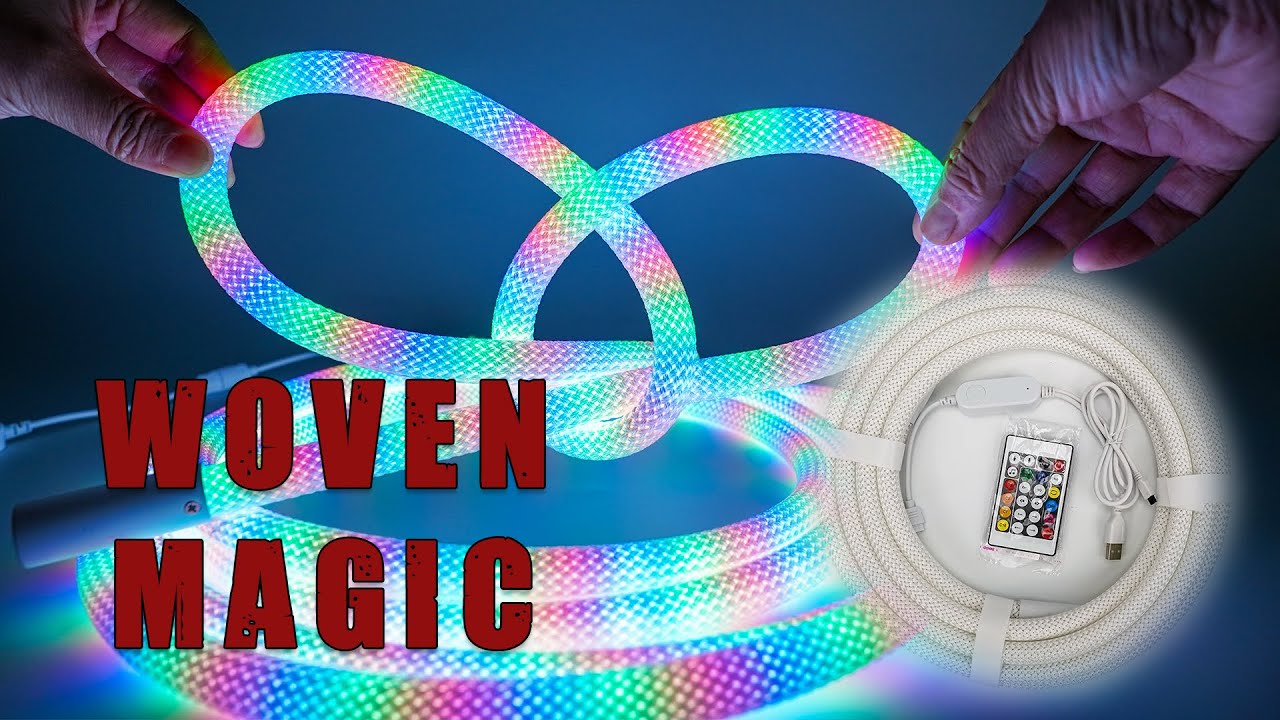
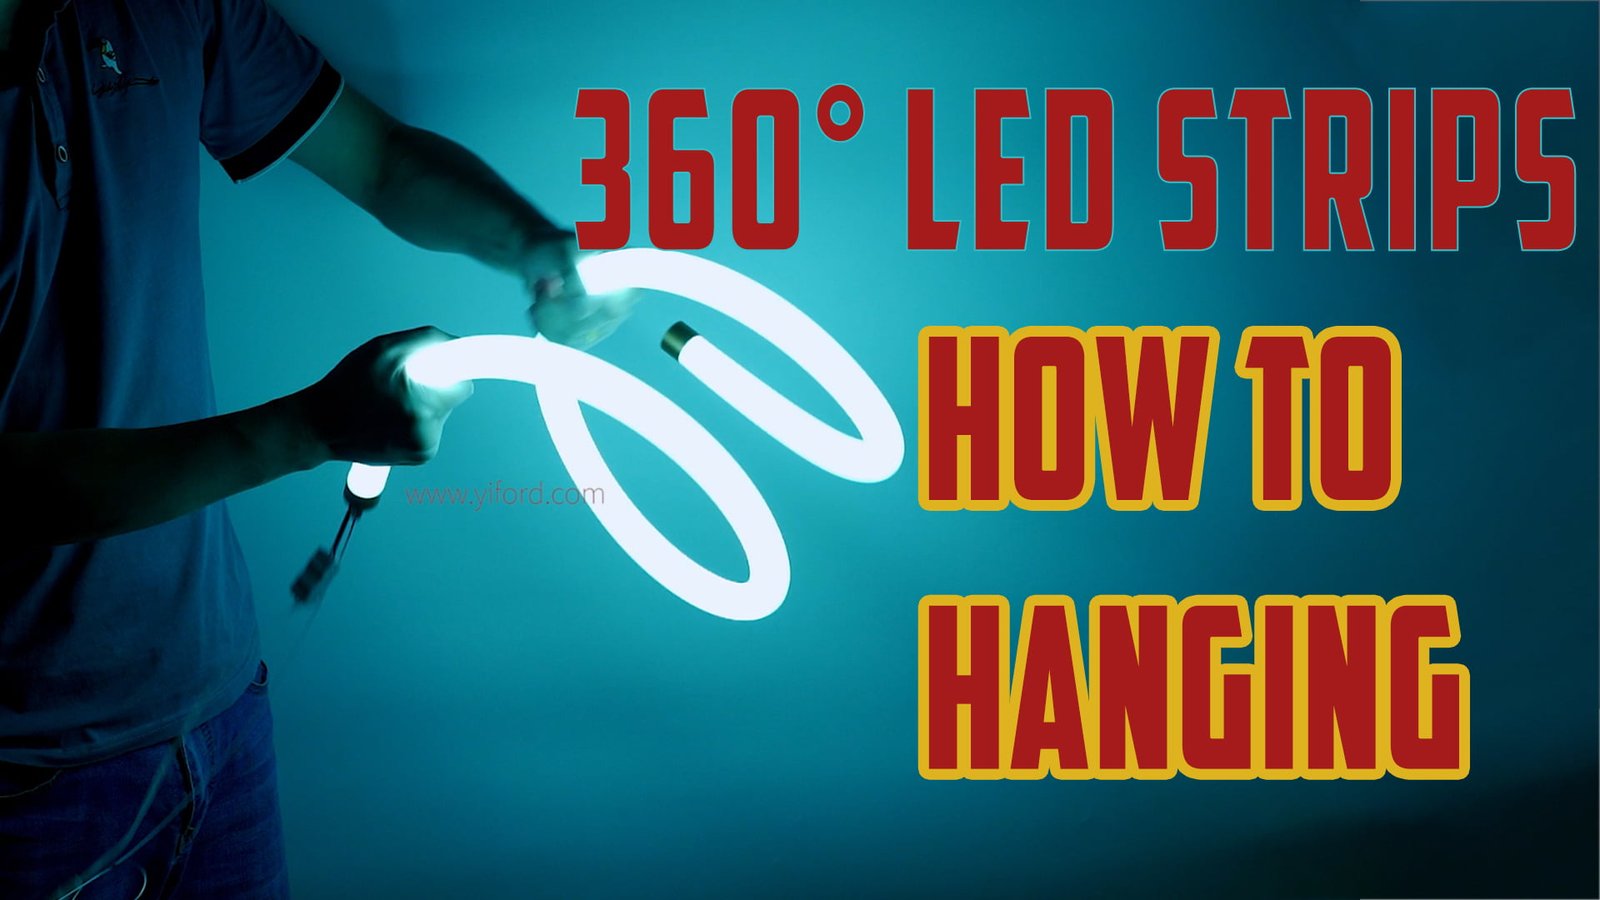
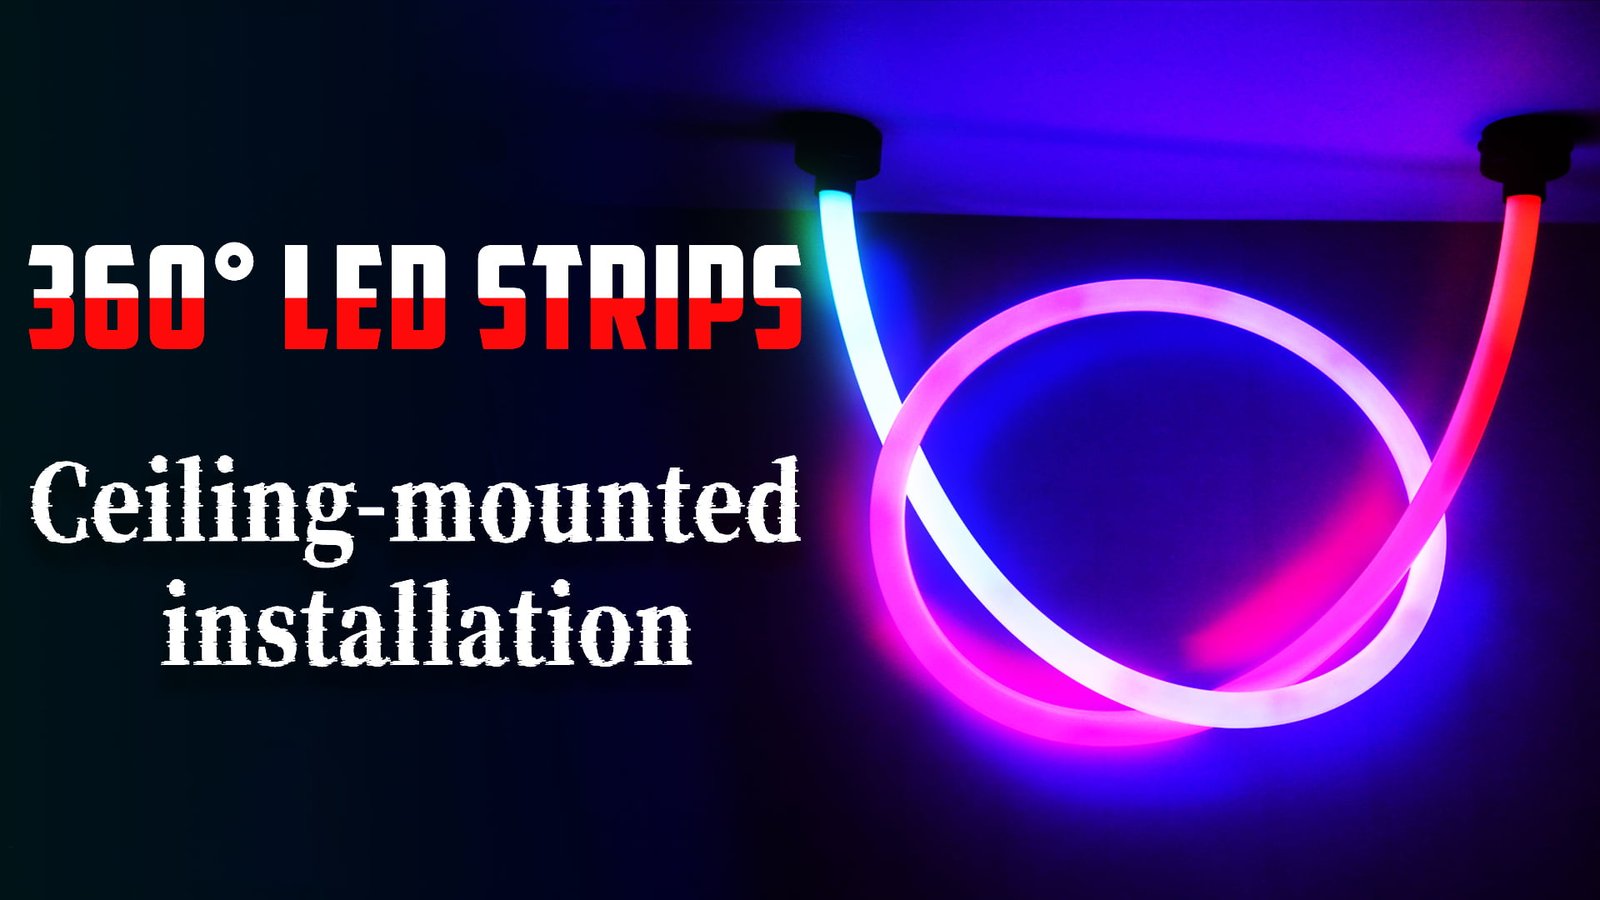
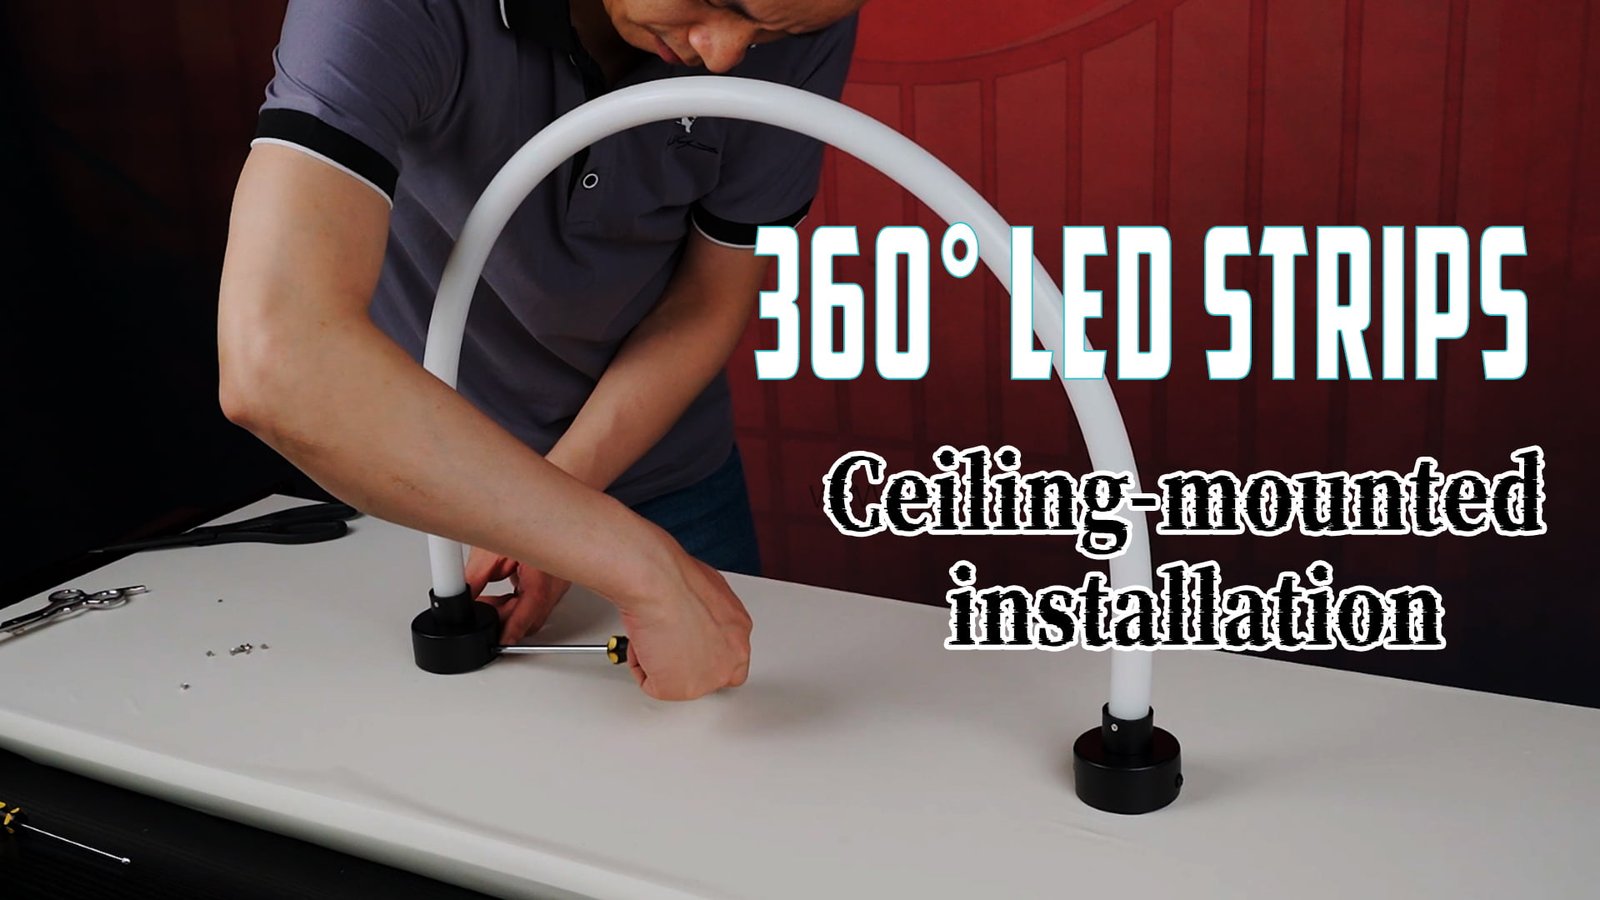
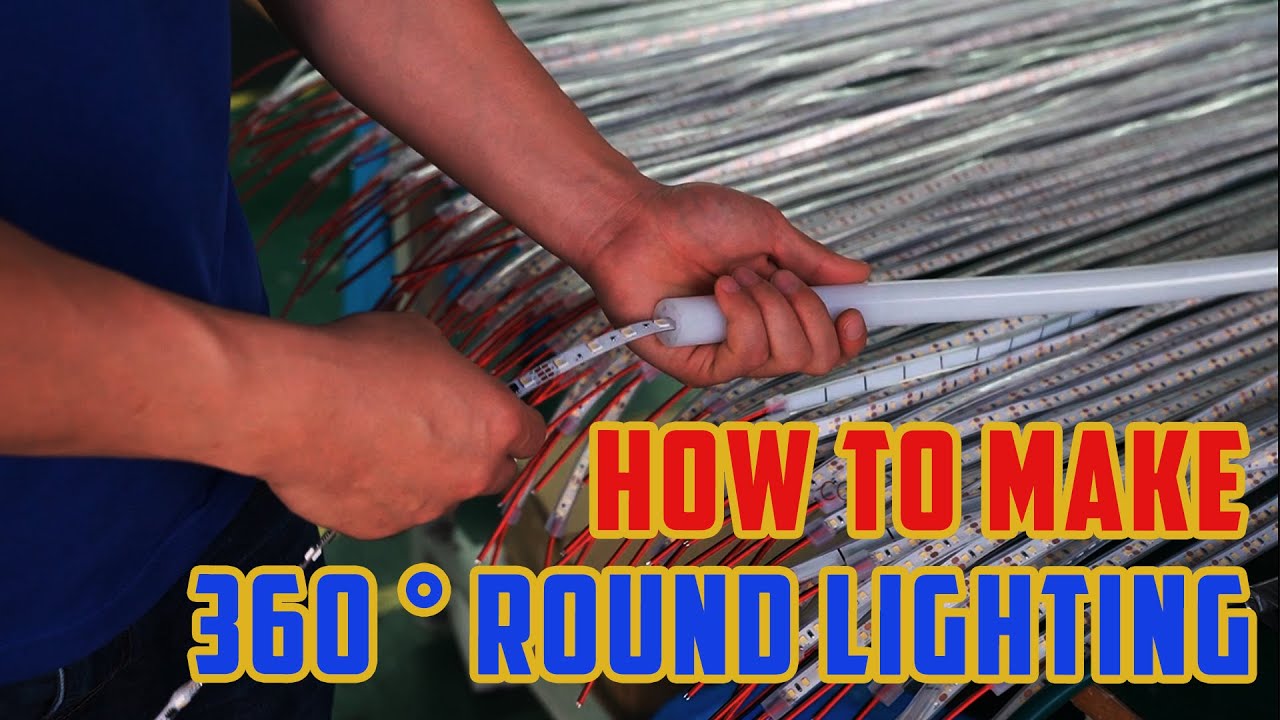
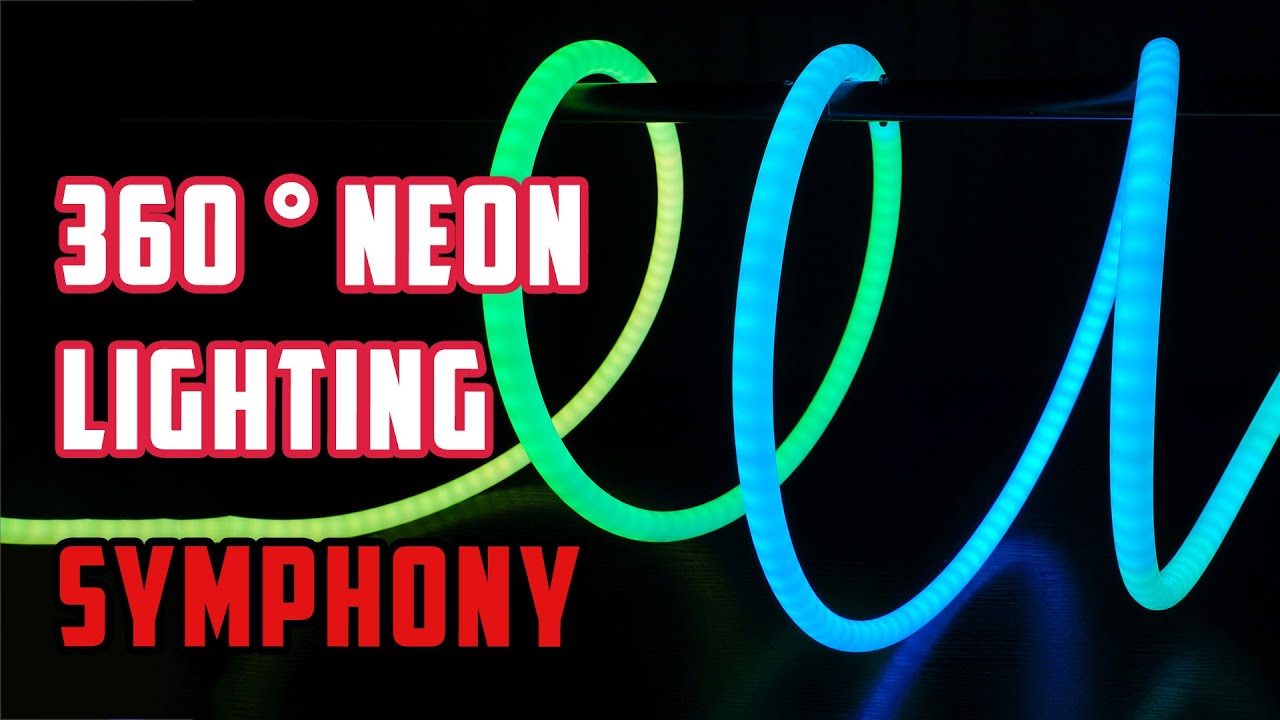
- Using silicone neon flex tubing with COB strips makes the assembly waterproof and allows for hundreds of custom shapes, ideal for both indoor and outdoor decorative lighting.
The Groover For LED Strip Lights
LED Aluminum Profile
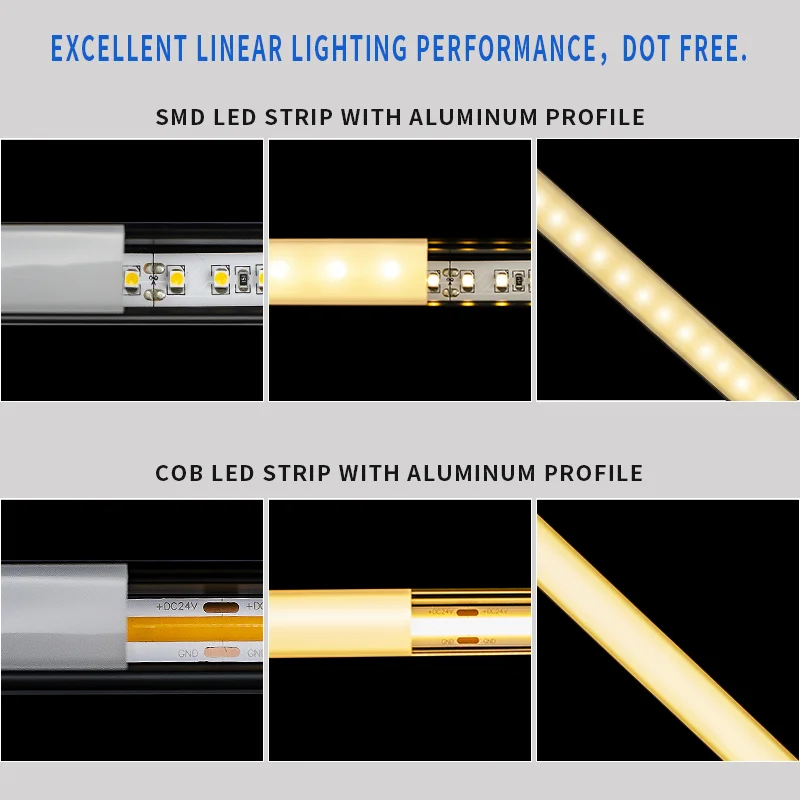
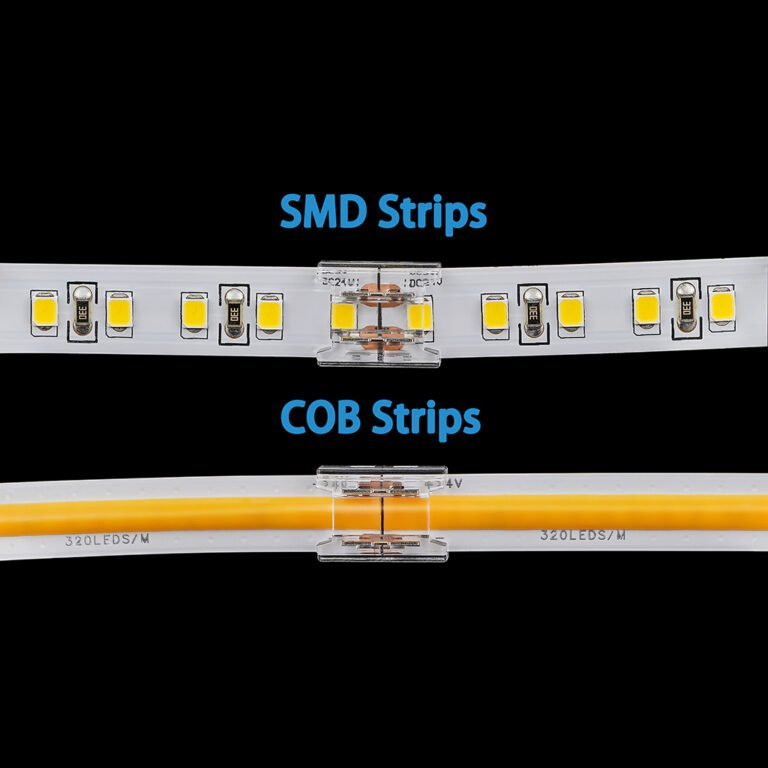
This aluminum profile is also useful for SMD light strips From the comparison chart, we can see that after the aluminum profile is added,
the light becomes more uniform, but the uniformity is still not as good as the features of COB light strips
the light becomes more uniform, but the uniformity is still not as good as the features of COB light strips
YIFORD provides three kinds of housings for LED light strips to meet the needs of users in different places:
1. If you want a flexible shell, need to bend or distortion, Neon Silicon Tube series you must consider. Strong flexibility, arbitrary bending, 30-degree to 360-degree light is available.
2. If you want hard linear lighting, Easy to shape, metal material, LED Aluminum Profile series will satisfy for you. Small shell, hundreds of different sizes, all corners can be applied.
3. If you want to use in commercial lighting, especially for the ceiling lights, Ceiling Lights special-shaped series is good choice. Large-scale shell, large-area lighting, easy to combine into different shapes.
Silicone LED Channels
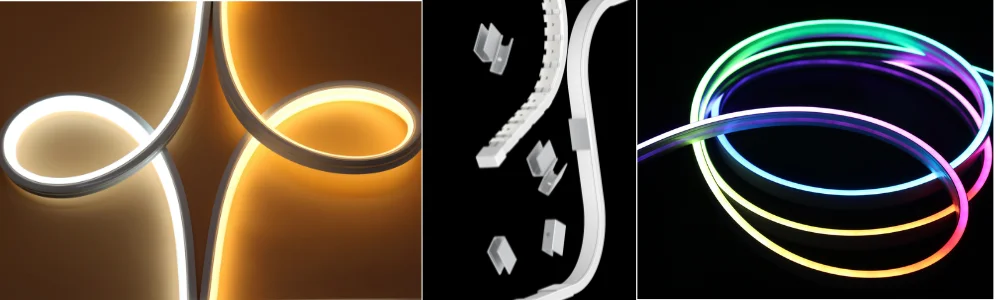
Neon flex silicon led strips is very common on our life, you may wonder what’s features is it, how to use the silicon flex led tube. you can watch below video:
The COB light strip is very simple. but work together with the soft silicone sleeve, it can be made into hundreds of thousands of shapes, and it is waterproof and can be used outdoors.
The use of COB light strips with LED aluminum profiles can create a lot of artistic spaces. if you want to know more about the led aluminum profile, read here All information about Led Aluminum Profile for LED Strip Lights
When buying these materials, you need to consider those factors, how to choose the best COB light strip, how to choose the most suitable housing, how to install the light strip, how to connect the light strip, how to apply the light strip, here are the most detailed explanations,
Get ready to buy cob led strips for your projects?
you may want to know everything before buy cob led strips. you will get all the information from here COB led strip lights buying guide
Features for Silicone LED Tube
Neon Flex Silicon LED Strip Lights Features
LED neon flex is a high quality, flexible LED strip lights with a unique co-extrusion technology. The combination of high quality and exceptional flexibility, allows for an endless range of indoor and outdoor applications. Uniform and without spot illumination at very low installation depths.
Neon FLex Strip Lights | smart rgb neon rope light
Every time or our any program we can think without lighting. lighting always bright our program more and more. If is it LED lighting then this program will be more exciting and colorful. our kids always like lighting. we can use our lighting wedding, birthday party, marriage ceremony, any kind of party.
Powering Your COB LED Strip Lights: What You Need to Know
Selecting the right power supply is crucial to maximize lifespan and stability.
- Calculate total power consumption: Multiply the wattage per meter of your strip by the total length. For example, for a 10W/m strip, powering 5 meters requires 50W.
- Add a 20% safety margin: For our example, choose a power supply rated around 60W to ensure longevity and prevent overload.
- Never use a power supply with less power than required — this risks damage and unstable performance.
- For longer installations, avoid powering a single strip longer than 5 meters in series. Instead, power multiple shorter strips in parallel to distribute current evenly and prevent voltage drop.
- Powers supplies come in waterproof and non-waterproof variants — choose according to project location (indoor/outdoor).
- Correct polarity matters: connect the strip’s positive to the power supply’s positive, and negative to negative. COB strips are protected against reverse polarity, so if connected incorrectly, the strip simply won’t light but won’t be damaged.
How to calculate the required power
To calculate the required power (watts), simply multiply the wattage per meter of the strip by the length of the strip to be powered. Therefore, if you want to power a 10W per meter strip to 5 meters, you only need to multiply 5 meters 10W per meter is enough, that is, 50 watts, and then increase the value of 20% on the 50 watts to get 60 watts, so a power supply rated at 60 watts or 72 watts will be an ideal choice. Even a 60-watt or 90-watt power supply is acceptable, because your COB strip will only extract the required power from the power supply.
connect drawing for led strips and power supply
When using a light strip, do not connect it too long, because a long light strip will cause the light strip to withstand too much current, which will damage the light strip. For a light strip of 10 meters per watt, we recommend that the longest one is 5 Meter. If you need to connect more,
you need to connect them in parallel and then connect to the power supply.
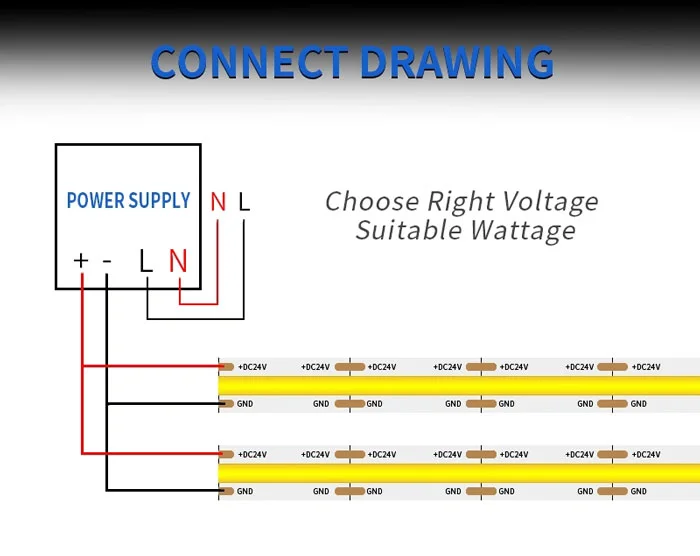
Waterproof and un-waterproof power supply
The power supply is divided into waterproof and non-waterproof type. The waterproof type has a wire,
and the non-waterproof type has a terminal or DC terminal. The user can choose the appropriate power supply according to their own project needs.
how to power led strip lighting, how to connect lighting strips. how to connect led strip lights to power supply.
Final Thoughts and Troubleshooting
- Always cut COB LED strips only at specified cut lines to avoid malfunction.
- Use solderless crystal connectors for hassle-free installation — perfect for DIYers and professionals alike.
- Match your power supply rating with the actual demand plus a safety margin.
- Employ LED aluminum profiles or silicone tubes to protect strips and improve their appearance and lifespan.
- If your project involves complicated wiring or specific environmental needs, contact professional suppliers like YIFORD for customized advice, samples, and after-sales support.
Lighting projects using COB LED strips unlock a world of creativity, from cozy residential atmospheres to stunning commercial displays. With the right knowledge, tools, and components laid out in this guide, you’ll be able to achieve a flawless installation and truly bring your design vision to light!
Looking for more guidance? Check out our instructional videos, product catalogues, and contact YIFORD for expert support and sample request
Get ready for projects?


 COB LED Strip Lights